
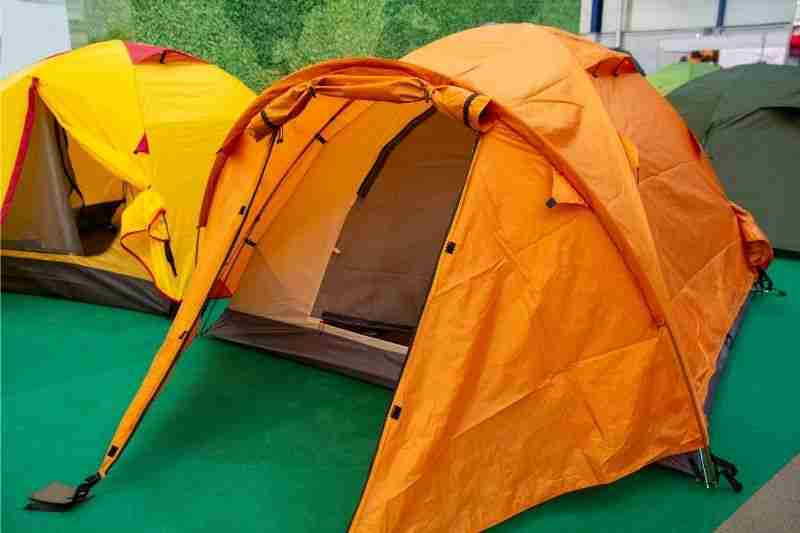
Buying your first camping tent is an exciting step toward exploring Canada’s great outdoors. Whether you’re planning a weekend at an Ontario provincial park, a family camping trip in the Rockies, or a summer getaway beside a lake, having the right tent can make your experience more comfortable and enjoyable.
However, shopping for a camping tent can feel overwhelming. Walk into an outdoor equipment store, and you’ll find everything from compact two-person tents to enormous family shelters with multiple rooms. With so many sizes, styles, and features, how do you know which one is right for you?
For most beginners planning to camp at established Canadian campgrounds, a three-season dome or cabin tent is a good starting point. Choose one with enough room for everyone, reliable rain protection, good ventilation, and a setup process you can manage comfortably.
You don’t need the most expensive tent in the store. You need one that suits the way you plan to camp.
This beginner’s guide explains what to look for, which features matter, how much to spend, and how to avoid common mistakes when choosing your first camping tent.
Think About How You Plan to Camp
Before comparing tents, consider where you’ll be camping, how you’ll get there, and who will be joining you. These decisions will help narrow your options considerably.
Car Camping vs. Backpacking
Car camping is one of the easiest ways to experience camping for the first time. You drive to a designated campsite, unload your equipment, and set up your tent nearby.
Because you’re not carrying everything on your back, tent weight isn’t usually a major concern. You can choose a larger, more comfortable tent with additional features.
Backpacking is different. You’ll carry your tent, sleeping equipment, food, and other supplies while hiking to your campsite.
Backpacking tents are designed to be lighter and more compact, although these advantages often come with higher prices and less interior space.
If you’re planning weekend trips to provincial parks or private campgrounds, a car camping tent will probably meet your needs.
Still deciding which style of camping suits you? Read our guide to Tent Camping vs. RV Camping: Which Is Right for You?.
Camping Alone, as a Couple, or With Family
The number of people sharing your tent will influence its size, layout, and features.
A solo camper might appreciate a lightweight dome tent that’s easy to assemble. A couple may want additional space for clothing and equipment, while families with children often appreciate a larger tent with enough room to move around.
If you’re camping with young children, consider how easily everyone can enter and exit the tent. Standing room can also make changing clothes and organizing sleeping equipment much easier.
Think about your future camping plans, too. A tent that works for a couple today might feel cramped if children or pets join your trips later.
What Size Camping Tent Do You Need?
One of the biggest mistakes beginners make is choosing a tent based entirely on its advertised sleeping capacity.
A four-person tent sounds like it should comfortably accommodate four adults, but that isn’t necessarily the case.
Tent capacity ratings generally describe how many people can sleep inside under relatively compact arrangements. They don’t always allow much extra room for backpacks, clothing, or other belongings.
Understanding Tent Capacity Ratings
For car camping, choosing a tent rated for more people than you expect to accommodate can make your trip more comfortable.
Here’s a practical starting point:
| Number of campers | Suggested tent size |
|---|---|
| 1 adult | 2-person tent |
| 2 adults | 3- or 4-person tent |
| 2 adults and 1 child | 4- or 6-person tent |
| 2 adults and 2 children | 6-person tent |
| 4 adults | 6- or 8-person tent |
These are comfort suggestions rather than strict rules. Actual tent dimensions, sleeping pad sizes, and how much equipment you bring will determine how well everything fits.
For example, a family of four could technically fit inside many four-person tents. However, a six-person model may provide extra room for sleeping bags, clothing, and moving around without climbing over each other.
Floor Space and Standing Height
Two tents with the same sleeping capacity can feel very different inside.
A dome tent typically has a rounded roof with walls that slope inward. Although the floor may be spacious, you won’t necessarily be able to stand upright except near the centre.
Cabin tents generally have taller, more vertical walls, providing greater usable headroom.
When comparing tents, check these measurements:
- Floor dimensions: The actual length and width of the sleeping area.
- Peak height: The maximum interior height.
- Usable headroom: How much space allows you to sit or stand comfortably.
- Packed dimensions: How much space the tent occupies when stored.
If you plan to use a queen-size air mattress, measure it before buying your tent. Remember that the mattress also needs room around it for access and other belongings.
Beginner tip: If possible, visit an outdoor retailer that has tents on display. Walking inside a tent can tell you more about its usable space than looking at a photograph.
Understanding the Different Types of Camping Tents
Camping tents come in several common styles. Each has advantages and disadvantages depending on your camping plans.
Dome Tents
Dome tents are a popular choice for beginner campers.
They typically use flexible poles that cross over the tent to create a rounded structure. Many designs are relatively easy to assemble and offer a practical balance of space, portability, and weather protection.
Their curved shape can help shed wind, although actual performance depends on the tent’s construction, anchoring, and setup.
One disadvantage is reduced headroom near the walls. This may not matter if you’re mainly using the tent for sleeping.
Dome tents are worth considering for couples, smaller families, and beginners who want a straightforward camping setup.
Cabin Tents
Cabin tents are designed with taller walls and a more rectangular interior.
Their main advantage is usable living space. Many models allow adults to stand upright, making it easier to change clothes, organize belongings, and help children get ready for bed.
Larger cabin tents may also offer room dividers, multiple doors, or separate sleeping areas.
However, they can be heavier and bulkier than dome tents. Their tall walls may also catch more wind, making proper anchoring especially important.
For families camping at established campgrounds, a cabin tent can be a comfortable option.
Instant and Pop-Up Tents
If assembling tent poles sounds intimidating, an instant tent might appeal to you.
Many instant tents use pre-attached poles that unfold or extend into position. This can reduce setup time and make the process easier for beginners.
Pop-up tents often use spring-loaded frames that expand when released from their carrying bags.
However, easy setup doesn’t automatically mean better weather protection. Some models are bulky when packed, and certain pop-up designs can be awkward to fold away.
Before buying, check how the tent performs in rain and wind, and learn how to pack it away properly.
Backpacking Tents
Backpacking tents prioritize low weight and compact storage.
These tents are designed for campers who need to carry their equipment over longer distances. Many use lightweight materials and minimize unnecessary space to reduce weight.
The trade-off is often a smaller interior and a higher price for lightweight construction.
Unless you’re planning overnight hiking trips, you probably don’t need a specialized backpacking tent for your first camping experience.
Which Tent Style Is Best?
| Tent type | Main advantage | Main disadvantage | Best suited for |
|---|---|---|---|
| Dome | Practical design and often easy setup | Limited standing room | Beginners and couples |
| Cabin | Generous interior and headroom | Heavier and bulkier | Families and car campers |
| Instant | Convenient assembly | May be bulky when packed | Casual campground camping |
| Backpacking | Lightweight and compact | Less interior space | Hiking and backcountry trips |
For most first-time Canadian campers, a dome or cabin tent offers a good combination of comfort, convenience, and affordability.
Choosing a Tent for Canadian Weather
Canadian camping conditions can vary considerably depending on where and when you travel.
A warm July weekend in southern Ontario is very different from an early spring camping trip in the Rockies or a windy coastal campground in Nova Scotia.
Your tent should be suitable for the conditions you’re reasonably likely to encounter.
Three-Season vs. Four-Season Tents
Most recreational camping tents fall into two broad categories.
Three-season tents are generally designed for spring, summer, and fall camping. They typically feature mesh ventilation, rain protection, and construction suitable for ordinary seasonal conditions.
For beginners camping between late spring and early fall, a three-season tent is usually sufficient.
Four-season tents are designed for more demanding conditions, such as snow loads, strong winds, and winter camping. They often use stronger structures and provide greater protection from exposed weather.
However, four-season tents can be heavier, more expensive, and less comfortable during hot summer weather.
It’s also important to remember that a three-season rating doesn’t guarantee safety in every spring, summer, or fall storm. Always consider the manufacturer’s specifications and current weather forecast.
Rain Protection: What to Look For
Rain protection should be near the top of your shopping checklist.
Even during summer, Canadian campgrounds can experience sudden thunderstorms and prolonged rainfall.
Look for these important features:
- Rainfly: An outer covering that helps protect the tent from rain.
- Full-coverage rainfly: A rainfly extending close to the ground, generally providing better protection from wind-driven rain.
- Sealed or taped seams: Protected stitching that helps prevent water from entering through needle holes.
- Bathtub floor: A waterproof floor that extends upward around the lower walls, helping keep surface water out.
- Waterproof fabric: Material designed to resist water penetration.
You may also see waterproof ratings expressed in millimetres, such as 1,500 mm or 3,000 mm.
These numbers refer to hydrostatic head, a test measuring how much water pressure the fabric can resist under specified conditions.
Higher numbers generally indicate greater resistance under that test, but they don’t tell the whole story. Seam construction, fabric condition, rainfly coverage, and proper setup also affect how dry a tent stays.
For beginners, a tent with a well-fitting rainfly, protected seams, and a waterproof floor is more useful than choosing solely by the highest advertised rating.
Ontario Parks also recommends looking for adequate rainfly coverage and a sturdy waterproof floor.
Ventilation and Condensation
Not all moisture inside a tent comes from rain.
Condensation occurs when moisture from breathing, damp clothing, and humid air collects on cooler tent surfaces.
You may wake up to find droplets on the inside of your rainfly even though the weather has been completely dry.
Good ventilation helps reduce this problem.
Look for a tent with mesh panels, adjustable vents, and a rainfly that allows air to circulate. Avoid sealing every opening unnecessarily, particularly during humid summer weather.
Remember that some condensation is normal. It doesn’t automatically mean your tent is leaking.
Consider Regional Camping Conditions
Canadian campers should consider the climate of their destination.
In Ontario and Quebec, summer camping often involves warm temperatures, humidity, insects, and occasional heavy thunderstorms.
Atlantic Canada can bring coastal winds, damp weather, and rain. Prairie campers may experience exposed campsites, strong winds, and rapidly developing thunderstorms.
British Columbia offers everything from damp coastal environments to dry interior conditions and cooler mountain destinations.
Northern and high-elevation camping can involve cold overnight temperatures even when daytime weather feels pleasant.
Wherever you’re camping, check the forecast shortly before departure. If severe weather is expected, consider changing your plans rather than relying on your tent to handle dangerous conditions.
Important Camping Tent Features Worth Considering
Once you’ve narrowed down the size and style, it’s time to look at the smaller details.
Some features are essential for comfort and protection. Others are convenient but not necessary for your first camping trip.
Doors, Windows, and Insect Screens
A well-designed entrance makes it easier to get in and out of your tent.
For couples and families, two doors can be especially convenient. One person can leave without climbing over someone who is sleeping.
Mesh windows and doors help improve airflow while keeping mosquitoes, blackflies, and other insects outside.
If you plan to camp in Ontario during mosquito season, good insect screening is particularly valuable.
Check the zippers, too. They should move smoothly without frequently catching the surrounding fabric.
Vestibules and Storage Pockets
A vestibule is a sheltered area outside the main sleeping compartment, usually created by an extended rainfly.
It’s useful for storing muddy shoes and other gear you want to keep protected from rain but outside your sleeping area.
Inside the tent, small storage pockets can help organize items such as:
- Flashlights or headlamps
- Eyeglasses
- Phones
- Keys
- Small personal belongings
Some tents also include a gear loft, which is a small mesh shelf suspended near the ceiling.
These features aren’t essential, but they can make a small tent feel more organized.
Keep food, scented toiletries, and other wildlife attractants out of your tent, regardless of how much storage space it offers.
Tent Poles, Stakes, and Guy Lines
Tent poles provide the framework that supports your shelter.
Many budget-friendly tents use fibreglass poles, while aluminum poles are common in models where strength, durability, and reduced weight are priorities.
The quality of the pole design matters as much as its material.
Tent stakes are pegs driven into the ground to secure the tent.
Guy lines are cords attached to the tent or rainfly to provide additional stability and help maintain proper tension.
You may also see tents described as freestanding. This generally means the tent structure can hold its shape without requiring stakes for its basic support.
However, freestanding doesn’t mean you should leave it unsecured. Always follow the manufacturer’s anchoring instructions, particularly when wind is possible.
Do You Need a Tent Footprint?
A tent footprint is a protective sheet placed underneath your tent.
It helps reduce wear on the floor caused by rocks, roots, and rough ground. It can also provide an additional barrier against ground moisture.
Some manufacturers sell footprints specifically sized for their tents. Others include them with the original purchase.
You can also use a suitable groundsheet, provided it is properly positioned.
Important: The footprint or groundsheet should not extend beyond the edges of the tent floor. Exposed material can catch rainwater and direct it underneath the tent, potentially making your sleeping area wetter.
This is also part of Ontario Parks’ campsite setup guidance.
The Coleman Tenaya Lake 8-Person Cabin Tent features a spacious interior, built-in storage closet, Fast Pitch setup system, and WeatherTec weather protection for comfortable family camping trips.
The Coleman Oasis Lite Pop-Up Canopy Tent with Wall Attachment offers quick setup, portable shade, and added wind protection. Featuring a lightweight frame, wheeled carry bag, and removable wall panel, it’s ideal for camping, sporting events, beach days, backyard gatherings, and other outdoor adventures.
The Coleman PEAK1 6-Person Dome Tent offers dependable weather protection, a spacious interior, and a unique star-view window for stargazing. Built with a strong aluminum frame and included footprint, it’s designed for campers seeking comfort, durability, and performance on family camping trips and outdoor adventures.
The Coleman Screened Canopy Tent with Instant Setup creates a spacious, bug-free outdoor shelter for camping, picnics, and backyard gatherings. Mesh walls provide excellent airflow while helping keep insects out, and the quick-setup design makes it easy to create shade and comfort wherever your adventures take you.
The Coleman Skydome Camping Tent offers quick setup, generous headroom, and Dark Room technology for a more comfortable camping experience. Available in multiple sizes, it’s ideal for families and groups looking for a spacious, weather-resistant tent that sets up fast and provides dependable shelter outdoors.
How Much Should You Spend on Your First Camping Tent?
Camping tents are available at widely varying prices.
It can be tempting to choose the least expensive model, especially when you’re purchasing several pieces of camping equipment at once.
However, spending a little more on suitable weather protection, reliable construction, or additional space may be worthwhile.
Budget-Friendly vs. More Expensive Tents
If you’re planning one or two summer weekends each year at established campgrounds, an entry-level tent may meet your needs.
Look for a model with reasonable construction, adequate rain protection, and enough sleeping space.
More expensive tents may offer lighter materials, stronger poles, improved waterproofing, or thoughtful design features.
These advantages can become more important if you’re camping frequently or travelling to places with challenging weather.
Price alone isn’t a guarantee of quality. Compare actual specifications, warranty coverage, and user feedback rather than assuming the most expensive model is automatically the best.
Where to Buy Camping Tents in Canada
Canadian outdoor retailers, sporting goods stores, and online shops carry tents for different budgets and camping styles.
Shopping in person has an advantage: you may be able to see an assembled tent and judge its size for yourself.
When comparing retailers, consider:
- The tent’s dimensions and included accessories
- Manufacturer warranty and replacement-part availability
- Return policies
- Availability of customer support
- Final price, including taxes and shipping
Check whether the advertised package includes the rainfly, stakes, guy lines, and carrying bag. Don’t assume every accessory comes with the tent.
Consider Renting or Borrowing Before Buying
If you’re unsure whether camping will become a regular activity, borrowing or renting a tent can make sense.
You can try a particular size or design without committing to a major purchase.
Buying a used tent is another possibility. However, inspect it carefully before relying on it.
Look for damaged poles, missing stakes, torn fabric, worn zippers, and deteriorating waterproof coatings.
If possible, assemble a used tent before purchasing it.
Also, remember that your tent is only part of your sleeping setup. A comfortable sleeping pad and an appropriate sleeping bag can make just as much difference to a good night’s rest.
Explore the Camping 101 section for more advice on preparing for your first camping trip and choosing essential equipment.
Common Mistakes Beginners Make When Buying a Tent
Choosing your first camping tent doesn’t have to be complicated, but several purchasing mistakes can lead to unnecessary frustration.
Buying a Tent That’s Too Small
This is probably the easiest mistake to make.
A couple purchasing a two-person tent may discover that their sleeping pads occupy nearly the entire floor.
A slightly larger tent can give you more room for clothing, personal items, and moving around.
Focusing on Price Instead of Weather Protection
An inexpensive tent might perform well during a warm, dry weekend.
However, poor rainfly coverage or inadequate construction can become a problem during heavy rain.
Before purchasing, check the tent’s weather-protection features and intended use.
Choosing a Tent That’s Difficult to Transport
Large family tents can be heavy and bulky.
Consider how much space you have in your vehicle and where you’ll store the tent at home.
If your campsite requires a walk from the parking area, weight and packed size may become more important.
Ignoring the Campsite Dimensions
Not every campground offers unlimited room for pitching a tent.
Some provincial and national park campsites have designated tent pads, and certain locations restrict where tents can be placed.
Before booking, check the campsite description and any posted restrictions.
A large eight-person tent may be comfortable inside but unsuitable for a small designated tent pad.
Paying for Features You Don’t Need
Multiple rooms, built-in lighting systems, and oversized entrances can be appealing.
However, every extra feature may add cost, weight, or complexity.
Start with a tent that meets your basic needs. You’ll have a better idea of which extras matter after gaining camping experience.
Set Up Your New Tent Before Your First Camping Trip
One of the best things you can do before leaving home is practise assembling your tent.
You don’t want to discover that you’re missing a pole or don’t understand the instructions after arriving at your campground late in the afternoon.
Parks Canada specifically recommends practising tent assembly at home before your trip.
Parks Canada
A Step-by-Step Practice Setup
- Unpack everything. Lay out the tent body, poles, rainfly, stakes, and guy lines. Check that all required components are included.
- Read the instructions. Different tents use different assembly systems, so follow the manufacturer’s directions.
- Choose a suitable practice area. Find a level, clear location without sharp objects or obstacles.
- Assemble the tent structure. Connect the poles and attach them using the sleeves, clips, or other fasteners provided.
- Attach the rainfly. Make sure it faces the correct direction and is secured according to the instructions.
- Stake the tent and secure the guy lines. Practise creating proper tension without overstressing the fabric.
- Check the interior. Bring your sleeping pads or air mattress inside to confirm everything fits comfortably.
- Take the tent down and repack it. Practise folding or rolling the components so you know how everything fits into the carrying bag.
If the tent becomes damp during practice, allow it to dry thoroughly before putting it into storage.
This simple exercise can make your first campground setup much easier.
For additional advice, visit our Camp Setup & Skills guides.
Choosing a Safe Place to Pitch Your Tent
Even a good tent can have problems when pitched in the wrong location.
At established campgrounds, begin by looking for a designated tent pad or approved camping area.
Choose level ground where possible, and avoid places where rainwater is likely to collect.
Before setting up, check for rocks, roots, sharp branches, and other objects that could damage the tent floor.
Also consider overhead hazards, including dead or damaged tree branches.
Keep your tent well away from the campfire and ensure that flying sparks or embers cannot reach it.
Wildlife and Food Storage
Canadian campgrounds are home to many species of wildlife, including raccoons, squirrels, and, in some regions, bears.
Never store food or scented items inside your sleeping tent.
Follow the campground’s food-storage requirements, which may involve using a locked vehicle, a designated food locker, or another approved storage method.
Keep your campsite clean and dispose of garbage properly.
Different parks have different wildlife regulations, so review the rules for your destination before travelling.
Never Cook Inside Your Tent
It might be tempting to bring a camping stove inside when it’s raining.
Don’t do it.
Fuel-burning camping stoves, barbecues, lanterns, and heaters can create serious fire and carbon monoxide hazards inside enclosed shelters.
Carbon monoxide is an invisible, odourless gas that can cause severe illness or death.
Cook outdoors in an appropriate location and follow the manufacturer’s instructions and campground regulations. Ontario Parks explicitly warns against cooking inside sleeping tents.
Ontario Parks
Your First Camping Tent Buying Checklist
Before making your final decision, use this checklist to compare the tents you’re considering.
- Is the tent suitable for car camping or backpacking?
- Is there enough room for everyone sleeping inside?
- Will our sleeping pads or air mattresses fit?
- Is the interior height comfortable?
- Is it suitable for the season and expected weather?
- Does it have adequate rainfly coverage?
- Are the seams and floor designed to resist water?
- Does it have good ventilation and insect screening?
- Are the doors easy to use?
- Can I assemble it without unnecessary difficulty?
- Are the poles, stakes, and guy lines included?
- Will it fit in my vehicle and storage space?
- Is it suitable for the campsites I plan to book?
- Does the price fit my overall camping budget?
You don’t necessarily need every available feature. Focus on the items that will affect your comfort, safety, and typical camping trips.
Frequently Asked Questions About Buying Your First Camping Tent
Is a Four-Person Tent Big Enough for Two Adults?
For many couples, a four-person tent is an excellent car camping option.
It generally provides more room than a two-person tent, allowing space for sleeping equipment and personal belongings.
However, always compare floor dimensions before purchasing, particularly if you plan to use a large air mattress.
Do I Need an Expensive Tent for My First Camping Trip?
Not necessarily.
A reasonably priced tent with adequate space, reliable weather protection, and good construction can work well for occasional summer camping.
Choose equipment suited to your expected conditions rather than purchasing features you may never use.
Can I Use a Three-Season Tent in Cold Weather?
A three-season tent may be suitable for some cool-weather camping trips, depending on the specific tent, forecast, and conditions.
However, a tent does not provide the insulation needed to keep you warm overnight.
You’ll also need an appropriately rated sleeping bag, an insulated sleeping pad, suitable clothing, and experience managing colder conditions.
For freezing temperatures, heavy snow, or exposed winter conditions, specialized equipment and additional preparation may be necessary.
Do I Need a Tarp Under My Tent?
A footprint or groundsheet is useful for protecting the tent floor, particularly on rough ground.
It’s not always essential, especially if your tent already has a durable floor and you’re camping on a well-maintained tent pad.
If you use one, make sure it doesn’t extend beyond the edges of your tent.
How Long Should a Camping Tent Last?
A tent’s lifespan depends on its materials, construction, frequency of use, and how well it’s maintained.
Exposure to sunlight, repeated wet storage, and rough handling can shorten its life.
To help your tent last longer, clean it according to the manufacturer’s directions, dry it completely before long-term storage, and repair minor damage promptly.
Your First Tent Is the Beginning of More Camping Adventures
Choosing your first camping tent is about finding the right balance between comfort, practicality, and price.
For most beginners camping at Canadian provincial parks, national parks, and private campgrounds, a three-season dome or cabin tent with enough sleeping space and dependable rain protection is a sensible choice.
Don’t worry about purchasing every possible feature or finding the perfect tent on your first attempt. Start with equipment that suits your camping plans, practise setting it up at home, and learn what works best as you gain experience.
Once you’ve chosen your tent, the next step is finding somewhere to use it!
Explore the campground listings at Camping Life Canada to discover camping destinations across the country. Whether you’re planning a quiet weekend beside a lake or a family adventure in a provincial park, your first camping trip could be the beginning of a lifelong outdoor hobby.
Leave a Reply